Showing posts with label upcycle. Show all posts

Saturday, October 14, 2023

DIY: From Recycle to Roses

Can you believe these roses were made from TP cores? (You can also use the inner cardboard from paper towel rolls or wrapping paper.)

Folks, after making some TP core snowflakes and poinsettias a few years back, I was ready for a new craft (one only needs so many Christmas decorations). I decided to try this tutorial for making roses.

First, start by tracing a flower shape onto your flattened toilet paper core. You should be able to get one out of each TP roll or 3 out of a paper towel roll. Note: my flower shape has 8 "petals", but the tutorial used 6. I think both results are lovely.

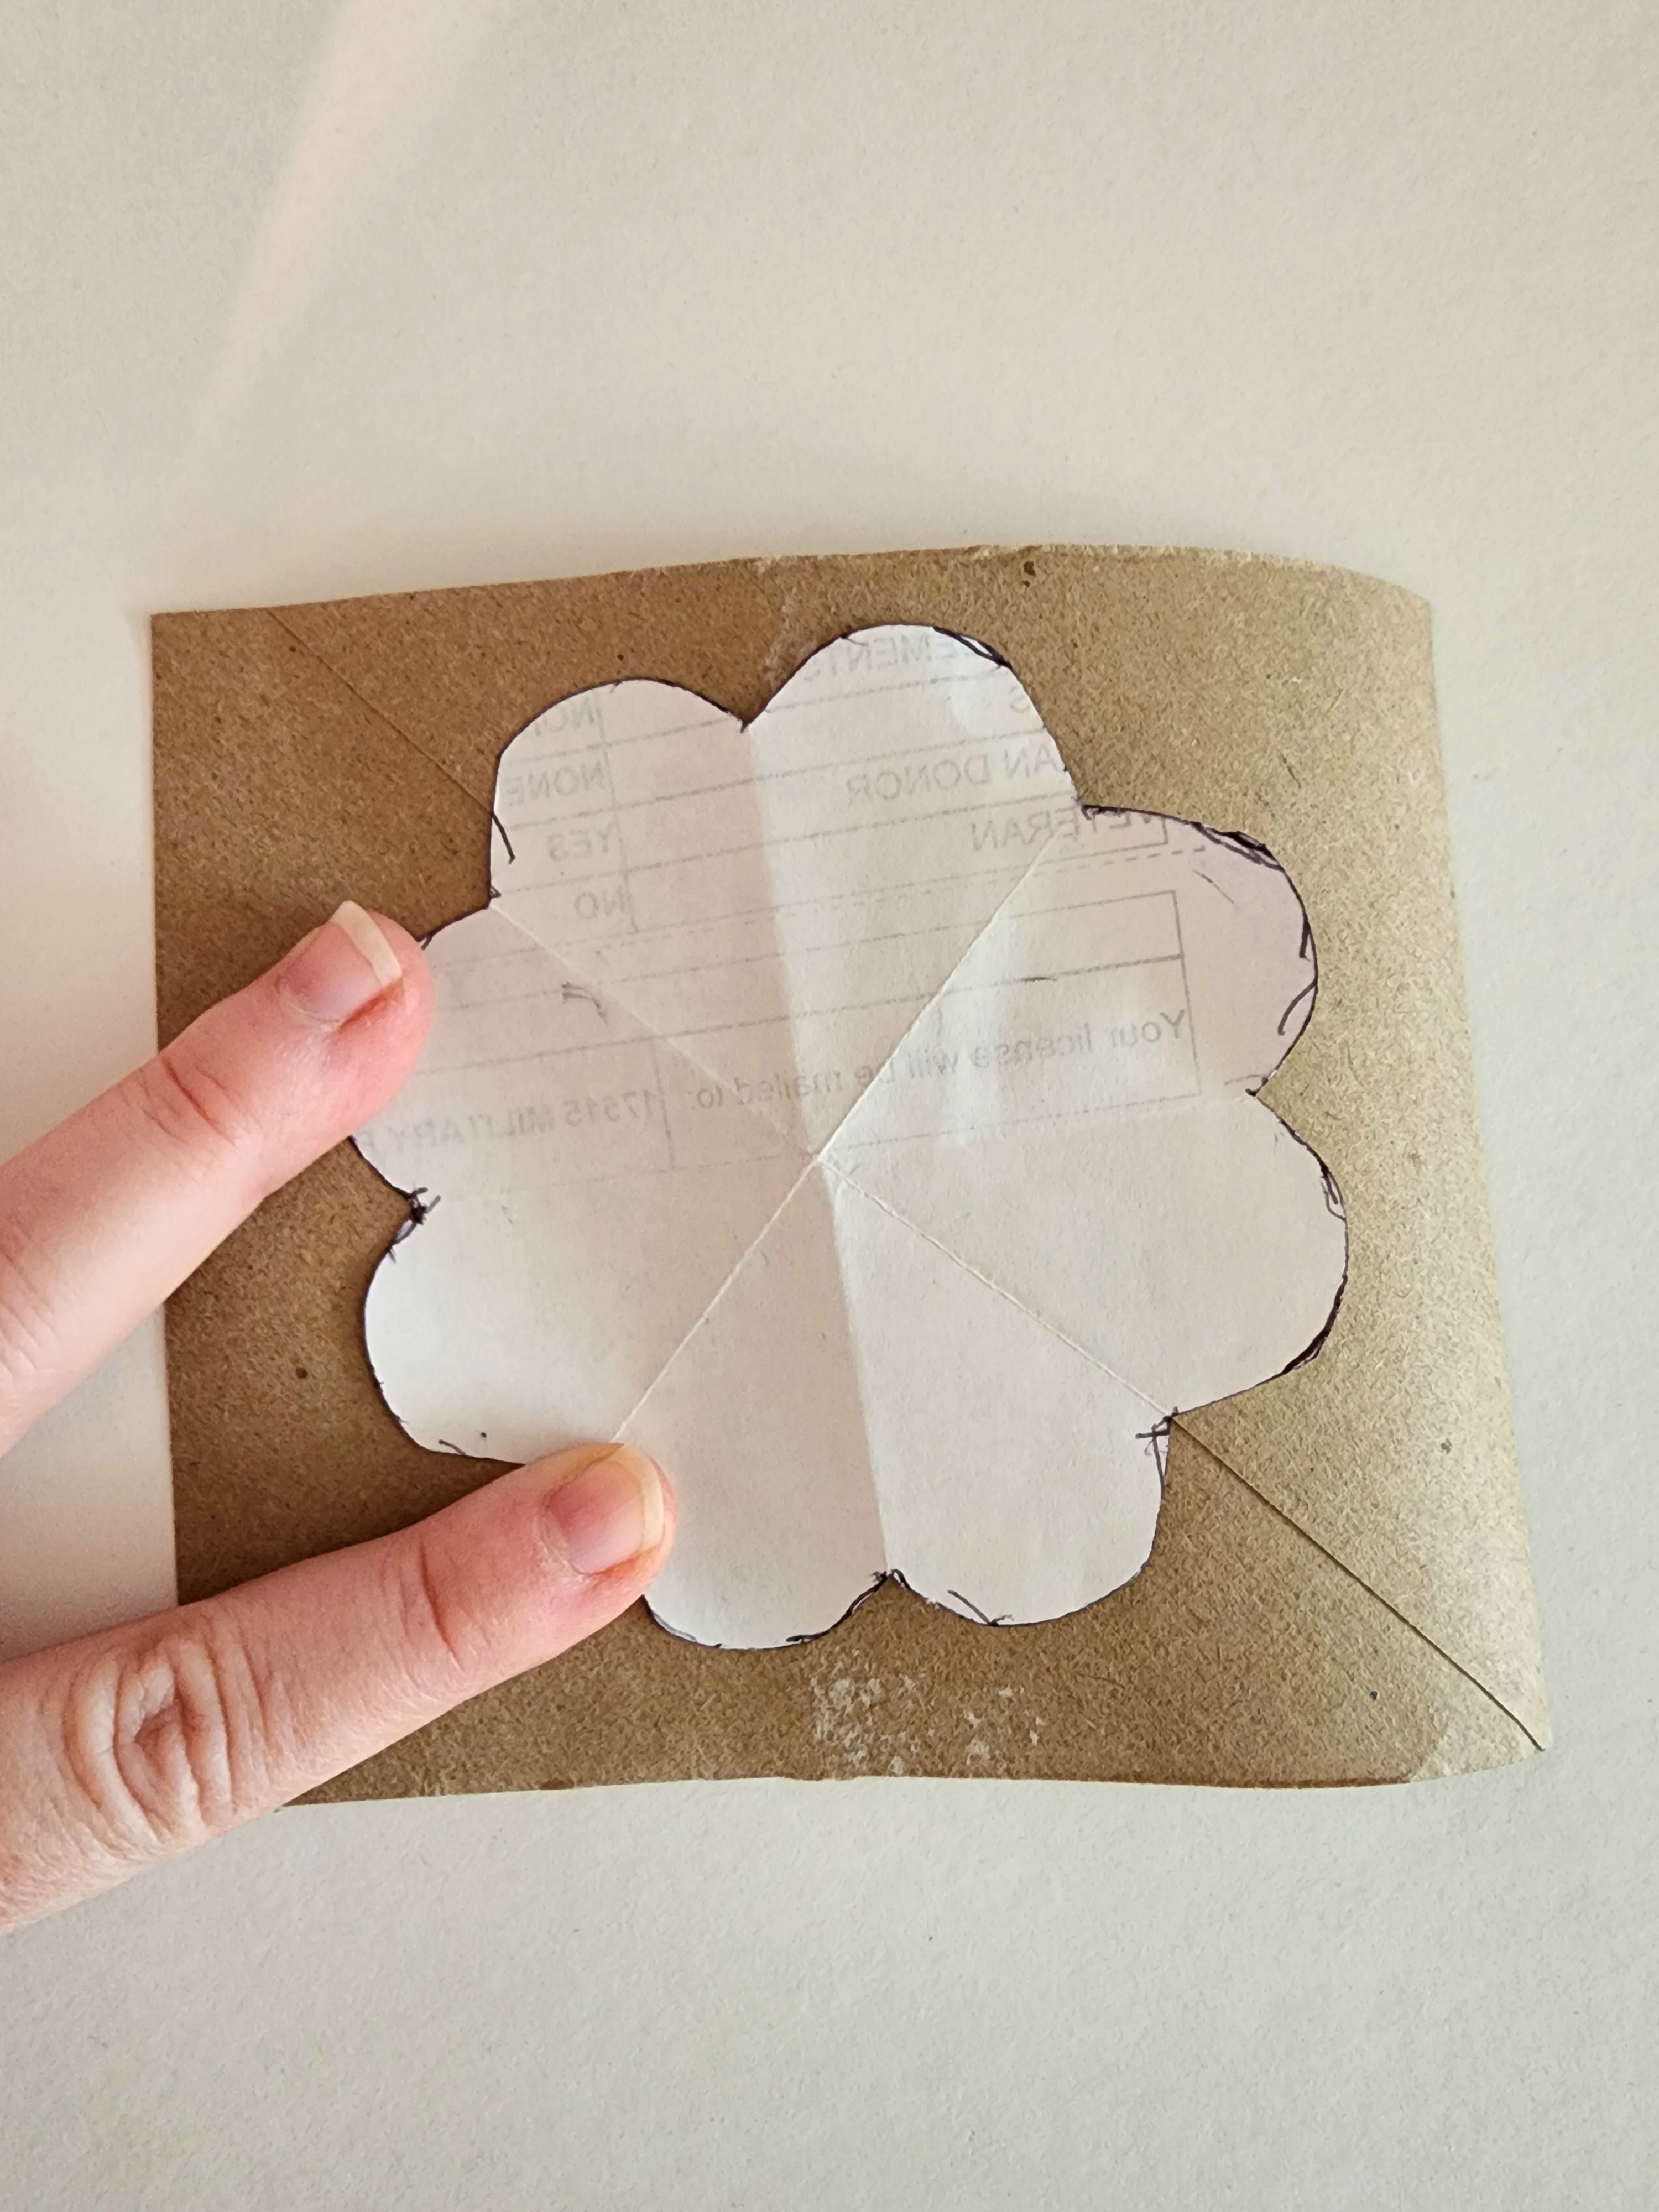
Cut out the flowers, and paint them the color of your choosing. Once dried, you'll need 3 1/2 of these flower shapes to make each rose. You'll cut one petal out of one so you have 2 shapes (1 petal and 7 petals). Repeat so you end up with seven pieces: 7 and 1, 6 and 2, 5 and 3, and 4. You'll have a half-flower/4-petal piece left over for your next rose.

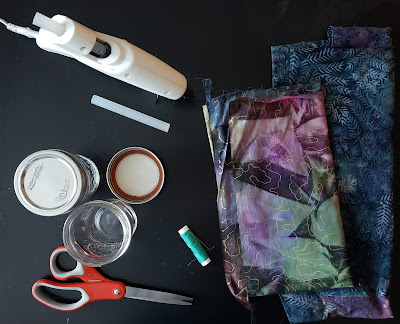
For each of the seven pieces, curl them up so the two flat edges meet, making a conical shape, and seal it with hot glue, super glue, or some other fast-drying and secure adhesive. I recommend against a glue stick (not strong enough) or tape (will end up very visible). I also recommend a small paint brush, popsicle stick or other implement to help push the edges together, so you aren't burning your fingers on hot glue or sticking them together with super glue.

One by one, glue each piece into the next (with just a dot of glue in the bottom of the larger layer), starting with the 7 petals, then 6, and so on, allowing the glue to harden between each.

Once all seven layers are together and glue dried, use your skinny paintbrush to help you curl the edges of each petal.Viola! You have a rose!

Optional: If you want to turn your roses into a larger craft, for example a wreath or a flower crown, you may want something attached to the rose to connect it to the larger piece. These roses have conical bottoms, so won't easily glue onto flat items. To help with this, I wove a floral wire through four points of the 7-petal layer, prior to gluing in the remaining layers.You could also do this with embroidery floss or other thick thread/thin ribbon.


Happy crafting!


Monday, October 2, 2023

How Are You Preparing For Halloween?

With Halloween just 4 weeks away, are you or your loved ones prepared to dress up? One of the coolest ways to have a stand-out costume is to skip the pre-packaged costumes, and develop a one-of-a-kind concoction through thrifting, swapping, and DIY. 

To give you some inspiration, here are some of my looks over the last few years: 

By attending a swap, I scored a chicken hat and beak. Read more about hosting a swap here

One year, I DIY'd an Ursula costume from thrifted pieces, with a little sewing and painting. Read a step-by-step here

The year I was Rock Lobster for Halloween, I was also able to resell some pieces to keep the fun going for the next person and recoup some cash. 

Then there was the year I was a time lord, the one and only Dr. Who, incorporating some second-hand pants and top.  

And last year, a combination of thrifting and DIY, let me bring a classic painting to life, and intentional use of double stick tape means I'll be able to reuse the main component as a formal gown in the future. 

This year, I've already acquired most of the components for my costume from online consignment, but am also happy I'll be able to re-use the blond wig from my Dr. Who costume. 


Wednesday, September 13, 2023

Twice Used Tires

Bikes - so great for recreation on a summer day (a pleasureful ride along the waterfront) or (for those more committed or more athletic than me) your commute. And while they are a planet-friendlier choice than most vehicles, did you know an estimated 44000 tons of bike tire inner tubes end in the landfill each year globally? 

The good news, bike riders, is that many local bike shops will take your spent tubes back for recycling, and some partner with artisans for them to be upcycled into new goods. 

This past weekend, I was happy to meet Portland artist Gina of Consciously Crafted Jewelry, who repurposes used inner tubes into jewelry. This feather design is just one of the several designs she offers, where the feather shapes are carefully cut from the inner tubes, painted, and then assembled into earrings.

My dear friend, A, helped me pick out these vibrant aqua/jungle colors at just the right length to suit my hairstyle. Although, if you have a more adventurous style, these came in many lengths, including shoulder-skimming!


At just $25, these earrings were just as friendly to my wallet as they are to the planet. And, as always, we love supporting local businesses and artisans. 

Interested in what other items can be made from inner tubes? Check out Alchemy Goods (Seattle), who creates backpacks, wallets, and more.


Tuesday, August 29, 2023

Spotlight: Danish Artist Makes Woodland Trolls from Reclaimed Wood

This weekend I had the pleasure of visiting one of 6 large sculptural trolls that make up the NW Trolls: Way of the Bird King exhibit. The trolls are made from reclaimed wood materials by Danish artist Thomas Dambo. For the West Seattle troll, much of it appears to be scrap lumber and shingles, and the flute she's playing is from a large part of driftwood. 

Each troll tells a story (this one is playing the song of the orcas), and even the overall project tells a great story. It is sponsored by the Scan Design Foundation whose mission is to support Danish-American relations, and they partnered with local indigenous tribes to support the building of the trolls. Thomas' goal is to show that with collaboration and community, we can build large things of beauty, even cities, with materials that would normally be considered waste.

This project is comprised of 6 trolls in the Pacific Northwest: 3 are currently live in Portland, Bainbridge Island, and now West Seattle. 3 are coming soon to Vashon Island, Issaquah, and Ballard.

To visit the West Seattle troll, head to Lincoln Park (the park just north of the Fauntleroy ferry dock), and walk down to the beach. The troll (named Bruunidun) is nestled among the trees next to Colman Pool. 

Here it appears that the driftwood flute is laying by her feet, and perhaps she's calling to the orcas with a conch shell. 

At closer look, she has such amazing detail, from the branches that make her hair to the small hoop earring she's wearing.


Every finger and toe is carefully designed. Decorations, such as her shell necklace and bracelet were contributed by Muckleshoot tribe artist John "Coyote" Halliday.


This selfie is for scale. With the other people beside her, you can see that Bruunidun stands over 15' tall. 

If you are able, go visit Bruunidun in West Seattle, or view more photos of the West Seattle troll and a short video with the artist from the unveiling at the West Seattle blog.

Learn more about the artist and see a worldwide Troll Map. 

Now... this type of project is not a DIY for the standard thoughtful consumer, as Thomas has years of experience, but perhaps it will inspire you for smaller reuse projects from scrap wood. Other ways you can help: 

  • Support the artist directly through his online shop. For example, in this hardcover art book featuring "hundreds of  photos, original poems and fairy tales, and behind-the scenes highlights, I tell how my crew and I—with the help of thousands of volunteers—scavenged over 250 tons of scrap wood to build a trolliverse spanning 17 countries (and counting!)."
  • Visit the artworks to show your support.
  • Tell your municipality that you support this type of artwork and want to see more in your area.
Happy Troll Hunting!

Sunday, April 24, 2022

From Scraps to Soup

If you haven't spent a lot of time in the seafood aisle of the grocery store, there are a few ways to buy shrimp: whole (you may need to remove head and vein), EZ Peel (head and vein removed), or fully peeled and tail removed. The less prepared they are, the cheaper they are, but the more work for you. I love the EZ Peel as a good middle ground. In order to remove the vein, they slice the shell the whole length of the shrimp, giving you a super easy place to start peeling (hence, EZ Peel). This leaves minimal effort to prep the shrimp and can save you $1-2/pound.


Not only do you save a few bucks, but now you have this resource which is rich in minerals and vitamins as well as flavor. Take the shells (legs, tails, and all) and put them in a container in your freezer to accumulate and not have your fridge smell fishy until you are ready to use.

 
Now it's time to use up those shells. (Note: you're about to stink up your kitchen, so open a window!) I'm combining a few recipes for corn broth and shrimp stock, including one that used both for a chowder base. In addition to shrimp shells (from 1lb shrimp), I saved 6 half corn cobs and shells from 2 leg sections of snow crabs. 
 

Dump those, and enough water to cover, in a large soup pot. I love these large Pyrex measuring cups for if you want more precision. One of the recipes called for 9 cups of water, and since I was using a lot of base ingredients, I upped that to 12.


Next add, some veggies, onion and celery for depth of flavor. You can use scraps for these too. Most veggie broth recipes call for using onion skins and the tops you would generally cut off. Your celery can 100% be a wilted stalk, a great way to clean out the fridge. (Side note: wilted celery can also be revived but storing in cold water. The wilting is due to water loss, and it will perk back up.)


Add all of this to the soup pot, along with a couple bay leaves and some whole peppercorns. Bring to a boil, reduce to low, cover and simmer for 1 hour.


It's that easy! Strain out all the solids (now you can compost those), and once it's cooled, portion and freeze what you won't use within a few days. I was super pleased after a taste test that this broth had a rich flavor with none of the bitterness I experienced with my first attempts at veggie broth.

Now what to do with this super flavorful broth? Keep in mind that both seafood and corn are a bit sweet, so while you can use this anywhere you would normally use broth, it will work better for things that can tolerate some sweetness. 

For both corn broth, shrimp broth, or combo like I made, it was recommended to use a base for soups or chowders.
 
For straight corn broth, it was suggested to make grits. 

I'm foreseeing some decadent risotto in my near future!

Sunday, March 6, 2022

DIY: Sewing Kit

As we approach spring, I've been doing several cleaning, decluttering, and reorganizing projects around the house, and of course I've come across several items I've kept "just in case" I came up with a project. So time to keep myself honest! 

I came across this easy tutorial for creating a pincushion from a mason jar, and decided to give it a whirl. (Click the link if you want additional directions or examples.)

First, I gathered my supplies (Cost - $0)
  • scraps of fabric (each pincushion will need a 6" square). Do you leftover fabric from making COVID masks, or quilting? If you aren't a sewer, do you have a work shirt or bed sheet that needs to be retired? The only requirement is that the fabric not be super thick, or you'll struggle to close the jar lid again. 
  • a mason/canning jar. This project requires the ring and lid style, so any random jar won't do. I used a jar from a previous jelly making experience.
  • quilt batting. I'll be honest; I kept the stuffing from a toy my dog destroyed. 😆
  • small scrap of felt or cardboard (2-3" circle). Also reused from previous craft projects. This is my 3rd time reusing this same felt. Most recently it served at part of a Halloween costume.

And tools: 

  • scissors
  • glue gun or fabric glue 
  • needle and thread

This is a beginner level project with no sewing skills required!

First, I'm cutting a 6" square out of my fabric. I like these water soluble pencils you can get at the craft store to mark your fabric, but none of our edges will show, so feel free to use any marking device. We're going to end up rounding the edges to make a circle. This project doesn't require an exact pattern, so feel free to free-hand it. If that makes you nervous, print and trace this 6" circle. Note: this pattern works for the smaller mason jars. If you have larger jars, you will likely need a larger circle.

Next: you're going to do a simple stitch around the edge of the fabric. Again, don't worry about being too precise. My stitches we're between 1/8" and 1/4". (The thread color also doesn't matter; the stitches will be hidden.) You'll leave the beginning and end of the circle as loose threads. When you start to pull on these tails, the circle will start to gather into a pouch.

Fill the pouch with your quilt batting. 

Next, insert the inner lid portion into the pouch. (The white you see below inside the pouch is the lid. I show a second lid beside it for reference.) Draw the strings tight, and tie them together in a knot.

Your felt or cardboard circle should be smaller than the lid center. You can trace the lid and then cut a little smaller. Glue it in place to cover the opening of your pouch and cover the stitching.

Push the poufy, quilt-batting-stuffed portion through the ring of the lid, so that the lid lays flush with the ring.

Fill your jars with any small sewing pieces (ex. buttons and bobbins), screw the lids back on, and use your new padded tops as pincushions.


Not only have you used up and upcycled your jar and fabric scraps, but you now also have storage to collect all these stray small notions. 


I was pleased with how easy this came together, and that it will help organize my increasingly messy craft room! These would also make a cute gift for crafty friends.


Saturday, September 11, 2021

Making Lemonade from Garage Scraps

My guess is that many of you can relate to a garage pile like this, am I right? Scraps of wood leftover from various projects, with the thought that some day you'd need a replacement piece, or just in case? (Just in case, what?)

And likely, you also have several cans of paint filling a shelf, left over from interior or exterior projects, just sitting there, separating into solids and liquids? 

Time to put those leftovers to good use!

We were sitting around one holiday weekend this summer, thinking it would be nice to have some outdoor games. Less competitive that cards, and less physical effort than kayaking. :) 

Shopping online, we saw that giant Jenga games started at $45 ($100 for Jenga brand!), supersize Connect 4 started at $70, and cornholes aka beanbag toss also started at $70 but could easily approach $200 depending on design. 

We were hesitant to spend a lot of money, especially if we didn't know how often folks would want to play. 

In comes all the scraps of would and paint just lying around. We decided we could easily make a pair of cornhole boards for free! And if we ended up just playing with them a few times, so big loss. My mom researched patterns for making the boards, and we gathered the fam for a construction project. 

Step 1: Gather your materials. We needed: 

  • two 4' x 2' sheets for the faces of the boards
  • 24' long of 1"x4" boards for the sides (or similar) 
  • ~ 5' of 1"x6" board for the legs
  • at least 2 colors of exterior paint, or interior paint and varnish
  • ~ 40 screws
  • tape measure
  • saw (We used a table saw, skilsaw, and reciprocating saw. You could use a handsaw if you have more patience.)
  • screwdriver or power drill/driver
Note: If you don't have all the materials, you may have success on Buy Nothing or Freecycle, and for tools, check out your local tool library

Step 2: Cut your wood and lay out the sides next to the face, to make sure you've cut everything right, and it all lines up. For the frame pieces, if you make the long sides 4', you need to make the short sides a couple inches shorter than 2' to accommodate for the width of the wood. Ex. if your wood is 1" thick, the short side should be 18" long.

Step 3: Screw the 4 sides of your frame together. It helps if you have a second set of hands for this project. Here, T is holding the wood steady for Uncle B, while Dad "supervises".

 
Step 4: Screw the face board to the frame and screw on the legs. Note: I gave approximate measurements for the leg boards because there are many different leg designs. We went with a simple fixed leg, while many designs had fold-flat legs.

 
Step 5: Cut a round hole for the bean bags to to be tossed into. This should be 6" in diameter. Turns out a spackle bucket was a perfect size to trace for an easy circle shape!

 
Step 6: Paint your boards. We went with white (house trim color) for one, and grey (house main color) for the other, so we would have contrasting boards for competing teams. In a future painting phase, we'll add beach-themed designs, like whales and dolphins, in the opposite color.


Step 7: Let dry, then play!

You do want to plan a few days for this project, depending on the time you have available. Ours will ultimately take 3 sessions on 3 different days. Day 1: wood construction and first paint coat. Day 2: second paint coat. Day 3: accent paint or fun designs.
 
While you're waiting for the paint to dry, don't forget you need bean bags! Since they're small, these can easily be made from fabric scraps from other projects, worn out clothes/sheets/tablecloths, or thrifted fabric.

Now we have a fun outdoor game to play, that was free to make ($70 savings!). Not only that, but it was a fun family activity to build the boards too. 

Here's to the last few weeks of summer!

Monday, November 9, 2020

Saving for Scratching

Last year, we got crafty with our toilet paper and paper towel cardboard cores, creating festive holiday ornaments. However, I only needed so many decorations, and there's a endless renewing supply of cardboard cores, so I needed some more ideas. 

Enter my sweet kitty Toby, who at 10 years old, has kitten energy and uses multiple scratching toys. Exhibit A, this cardboard scratcher that goes for $9.99 at PetSmart. 


This type of toy was the right option to use up LOTS of cardboard, so let the DIY games begin!

Step 1: Cut the TP rolls in half. Thinner rolls can be flattened and cut with scissors, while thicker cores can be cut with a utility knife.
 

Step 2: Cut up the side of the roll so you have a strip of cardboard, and roll it up into a tight spiral. I rolled it around a pencil to get the spiral started. (You can use any scrap cardboard. Here I'm using coffee sleeves too!)

Step 3: Choose a box that will act as a frame for your scratching board. I used a flat box that held our groceries from Costco. How appropriate that the coffee addicts in our house brought home a Coffee-mate box. :) Start filling the box with rolls. Some rolls you'll leave uncut, as tubes, while the rest will be curled up inside the uncut rolls. Let your cat inspect at various progress points to make sure you are doing it to his satisfaction.


Tip: if you are using scrap corrugated cardboard, check which direction you are cutting. Cutting against the ridges will give you a pocketed appearance, like the roll on the left. Cutting with the ridges will give you the layered look, like the roll on the right. Feel free to alternate, and see what textures your kitty enjoys digging their nails into.
 
Step 4: Once you have enough tightly-filled tubes to fill the box, use some hot glue to secure the tubes to the base of the box.
 
 
Step 5: Close any remaining gaps with a few little spirals. 
 

Step 6: Salt bae on some catnip. Your kitty deserves the best "seasoning".

Step 7: Observe your kitty enjoying his new toy. It may have saved you $10 at the store, but you invested many hours of love, rolling cardboard, and he can tell!

Is it a scratcher, or a throne?

Definitely a scratcher.

Or maybe a lounging scratcher.


Monday, November 2, 2020

Another DIY Halloween

Another Halloween, another round of thrifting and/or DIY'ing (from second-hand materials!) my costume. Even with COVID this year, I figured there would be an opportunity for some festivity, and Halloween did not disappoint! For work, I was able to dress up for a virtual happy hour with one group of colleagues, and a virtual team trivia event for another. And for the weekend, Tatiana and I swapped our usual late night people-watching for an outdoor coffee.

In August, I teased you with this arrival from Poshmark. 

And in September, I hinted at more to come, with Toby guarding this stash of second hand fabric, I acquired from Value Village. 


Straight to the punchline, I went as the famous palindrome meme: Tacocat! Pairing a super cozy kitty onesie with a DIY taco cover, this costume is warm enough for a chilly northwest October.
 

Now the how-to: Starting with a pair of red place mats, I painted some details with acrylic paint and fabric medium, then cut out the desired half-circle shape to create a couple slices of tomato.

This pic shows a few steps: I cut the yellow felt into a large enough circle to wrap around me, creating the taco shell, and sponge painted some brown and lighter yellow spots, for a toasted corn tortilla texture. I cut a smaller circle out of the top center, creating a arm hole. Next, to create the "lettuce", I sewed the ruffled border of a green tablecloth around the perimeter. A loop of lettuce creates a shoulder strap for my other shoulder. Pictured here are some adhesives and velcro strips; the velcro was great for fitting the costume, but ultimately not strong enough for a costume I wanted to be able to sit and stand in. I replaced the velcro strips with ribbons.

Next, secure the tomato slices to one side of the taco shell, sewing the slices right behind the lettuce.

Use velcro or ribbons to fasten the other side of the tomatoes to the other side of the shell.


Put the final look together, and... tacocat! First pic is me in costume, followed by the a version of the meme. Nailed it!

Not only is it a ton of fun to put these costumes together, but it also saves $$$ and new materials from one-time use. This pre-fab taco costume was found at Target for $30, while the second-hand fabrics were just $8 at Value Village. The cat onesie ran $25 new at Target last year, and cost $9 like new at Poshmark.


Total cost: $17

Compare at: $55 new

And, did I mention the cat onesie has pockets? It may become my winter go-to outfit!