Showing posts with label diy. Show all posts

Sunday, February 4, 2024

DIY for your Valentine

T and I like to collect Christmas ornaments on vacations and for important life moments. Then, when we set up our tree each year, it's like flipping through a scrapbook and revisiting those moments. 

So a couple weeks ago, as we're contemplating taking it down for the season, T says, "You know we should've gotten an ornament for when I had my gallbladder removed." A little creepy, yes, but also one of the most exciting things to happen to us during COVID!

Thus started the craft project to make him a gallbladder ornament (I mean, NO stores will carry those...).  I will give this to him for Valentines Day, where typically you give your loved one your heart, but hey, it's still an organ?

To make this ornament, I just needed some fabric, a scrap of ribbon, a little fluffing, a few beads, and a pipe cleaner. For such small pieces, it was easy to use scraps from other projects, so completely free in terms of materials. 

I cut an old work shirt into the pear-shape for the gallbladder, complete with bile duct and hepatic duct. I sewed around the edges by hand and leaving the edges exposed for a more hand-crafted rustic look. I sewed the ribbon in as I went, creating a loop to hang the ornament from the tree. Into the gallbladder went the stuffing, and into the ducts went a pipe cleaner (it's a shapable ornament!).

Sew on a few beads to represent gall stones (naturally!).

And for most of our ornaments, we write the year on with a gold Sharpie. Since this is a fabric ornament, I sewed on the year with gold thread.

While this is a truly one-of-a-kind type of gift, the same ideas can be used for your loved ones! Whether a homemade card, ornament, or other trinket, small gifts can be easy to make by repurposing materials from around the home, and show that personal touch!


Wednesday, December 20, 2023

Quick Craft: From Last Year's Greeting Cards to this Year's Gift Tags

I really enjoy receiving holiday cards, especially from my loved ones who live far away and I don't get to see as often as I like. But eventually (usually just in time for the next year's batch), it's time to pick my favorites for the scrapbook and retire the rest. 

But did you know... 1.3 Billion (yes with a "B") holiday cards are sold each year in the US? And then subsequently put into storage or thrown away?

For those that aren't photo cards, the festive text and images are ripe for repurposing! Today, I'm cutting out the best parts into gift tags.

Take this card, for example:

The layout and size of text and images makes it really easy to cut out 2 tags, one of the Danta abd one of the text. 

Simply cut out your preferred shape and attach to your gift package. 

Now, this type of card requires a little more creativity. Since the whole card is one big image, you'll need to select a portion of the image for each tag. (Note: a card like this isn't even recyclable due to the glitter, so it's a great pick for giving a little more life!)

I chose to use cookie cutters to assist this process. Since they have no center, you can see through to frame which portion you want to show. Once you've selected the area you want, you can trace around the cookie cutter as the outline of a festive-shaped tag.

After tracing, cut out your tag, and attach to your package.

Happy merry-making! Feel good knowing that you got free tags, and gave a second use to a some paper.


Saturday, October 14, 2023

DIY: From Recycle to Roses

Can you believe these roses were made from TP cores? (You can also use the inner cardboard from paper towel rolls or wrapping paper.)

Folks, after making some TP core snowflakes and poinsettias a few years back, I was ready for a new craft (one only needs so many Christmas decorations). I decided to try this tutorial for making roses.

First, start by tracing a flower shape onto your flattened toilet paper core. You should be able to get one out of each TP roll or 3 out of a paper towel roll. Note: my flower shape has 8 "petals", but the tutorial used 6. I think both results are lovely.

Cut out the flowers, and paint them the color of your choosing. Once dried, you'll need 3 1/2 of these flower shapes to make each rose. You'll cut one petal out of one so you have 2 shapes (1 petal and 7 petals). Repeat so you end up with seven pieces: 7 and 1, 6 and 2, 5 and 3, and 4. You'll have a half-flower/4-petal piece left over for your next rose.

For each of the seven pieces, curl them up so the two flat edges meet, making a conical shape, and seal it with hot glue, super glue, or some other fast-drying and secure adhesive. I recommend against a glue stick (not strong enough) or tape (will end up very visible). I also recommend a small paint brush, popsicle stick or other implement to help push the edges together, so you aren't burning your fingers on hot glue or sticking them together with super glue.

One by one, glue each piece into the next (with just a dot of glue in the bottom of the larger layer), starting with the 7 petals, then 6, and so on, allowing the glue to harden between each.

Once all seven layers are together and glue dried, use your skinny paintbrush to help you curl the edges of each petal.Viola! You have a rose!

Optional: If you want to turn your roses into a larger craft, for example a wreath or a flower crown, you may want something attached to the rose to connect it to the larger piece. These roses have conical bottoms, so won't easily glue onto flat items. To help with this, I wove a floral wire through four points of the 7-petal layer, prior to gluing in the remaining layers.You could also do this with embroidery floss or other thick thread/thin ribbon.


Happy crafting!


Monday, October 2, 2023

How Are You Preparing For Halloween?

With Halloween just 4 weeks away, are you or your loved ones prepared to dress up? One of the coolest ways to have a stand-out costume is to skip the pre-packaged costumes, and develop a one-of-a-kind concoction through thrifting, swapping, and DIY. 

To give you some inspiration, here are some of my looks over the last few years: 

By attending a swap, I scored a chicken hat and beak. Read more about hosting a swap here

One year, I DIY'd an Ursula costume from thrifted pieces, with a little sewing and painting. Read a step-by-step here

The year I was Rock Lobster for Halloween, I was also able to resell some pieces to keep the fun going for the next person and recoup some cash. 

Then there was the year I was a time lord, the one and only Dr. Who, incorporating some second-hand pants and top.  

And last year, a combination of thrifting and DIY, let me bring a classic painting to life, and intentional use of double stick tape means I'll be able to reuse the main component as a formal gown in the future. 

This year, I've already acquired most of the components for my costume from online consignment, but am also happy I'll be able to re-use the blond wig from my Dr. Who costume. 


Wednesday, December 28, 2022

From Junk to Jar Gift

It started innocently enough. I've been keeping glass jars out of my recycling for possible reuse. And with the holiday season approaching, I just knew I could use a couple for gifts. Hot cocoa kit? Cookie baking kit? Sewing kit? After wracking my brain, I decided I wanted to make some snowglobes.

This turned into a long lesson on how to (and how *not to*) make a DIY snowglobe.

First step, head to the thrift shops and find cute little toys or figurines to create the scene. I left Goodwill with an awesome white glossy rearing unicorn. Dubbed "Ulrich", the unicorn started at $5, but since it was discount day for blue tags, he was marked down to just $3. This adventure is starting out strong. 

This is the eventual majestic snowglobe:


Ulrich comes home with me, and the next step is choosing the right jar to put him in. I try the largest spaghetti sauce jar... then the largest pickle jar... and to my dismay, none of my many saved jars are big enough. I rack my brain... maybe a large Adams peanut butter jar. I would totally use more peanut butter, and could divvy it up into some of my smaller jars. So I measure Ulrich, and I'll need a minimum 3" jar opening, and 7" height. 

On to the grocery store with my measuring tape. I go from aisle to aisle, measuring the pickled artichoke hearts, and the bulk dill pickles, and finally getting on my knees in the grocery store to measure the Adams peanut butter. Nothing is larger than 6" tall! <sob>

Finally, I cave, head to Michael's, and purchase a giant, half-gallon Mason jar. Lesson 1: the knick-knacks for inside your snow globe need to be much smaller than you think!

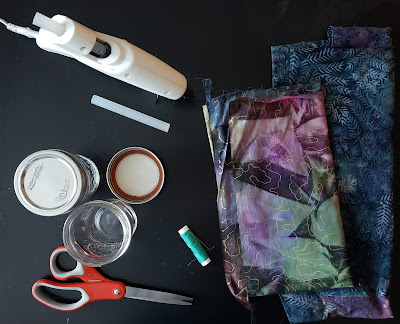
Now that I've aquired my jar and unicorn, I can start assembling. Ulrich is adhered to the lid with some waterproof silicone sealant. Pro tips: 1) make sure your adhesive is waterproof, 2) apply in a well ventilated room (such as a bathroom with the fan on), and 3) make sure you know the curing time (this one takes 24 hours).


You can decorate the lid if you want to cover any branding or just to embellish for fun. Metallic or sparkly nail polish work great.


Once your scene is secure and cured, you can start adding liquid and "snow". To make your snow fall slower, you'll add some glycerin. Glycerin is a moisturizing, vegetable-based product that is used in soaps and lotions.


You'll only need a small amount, so save to use by itself as a moisturizer, or add to other DIY bath and body projects.

Next, figure out what you want your "snow" to be. Pay attention. I learned *all* the lessons. :-D

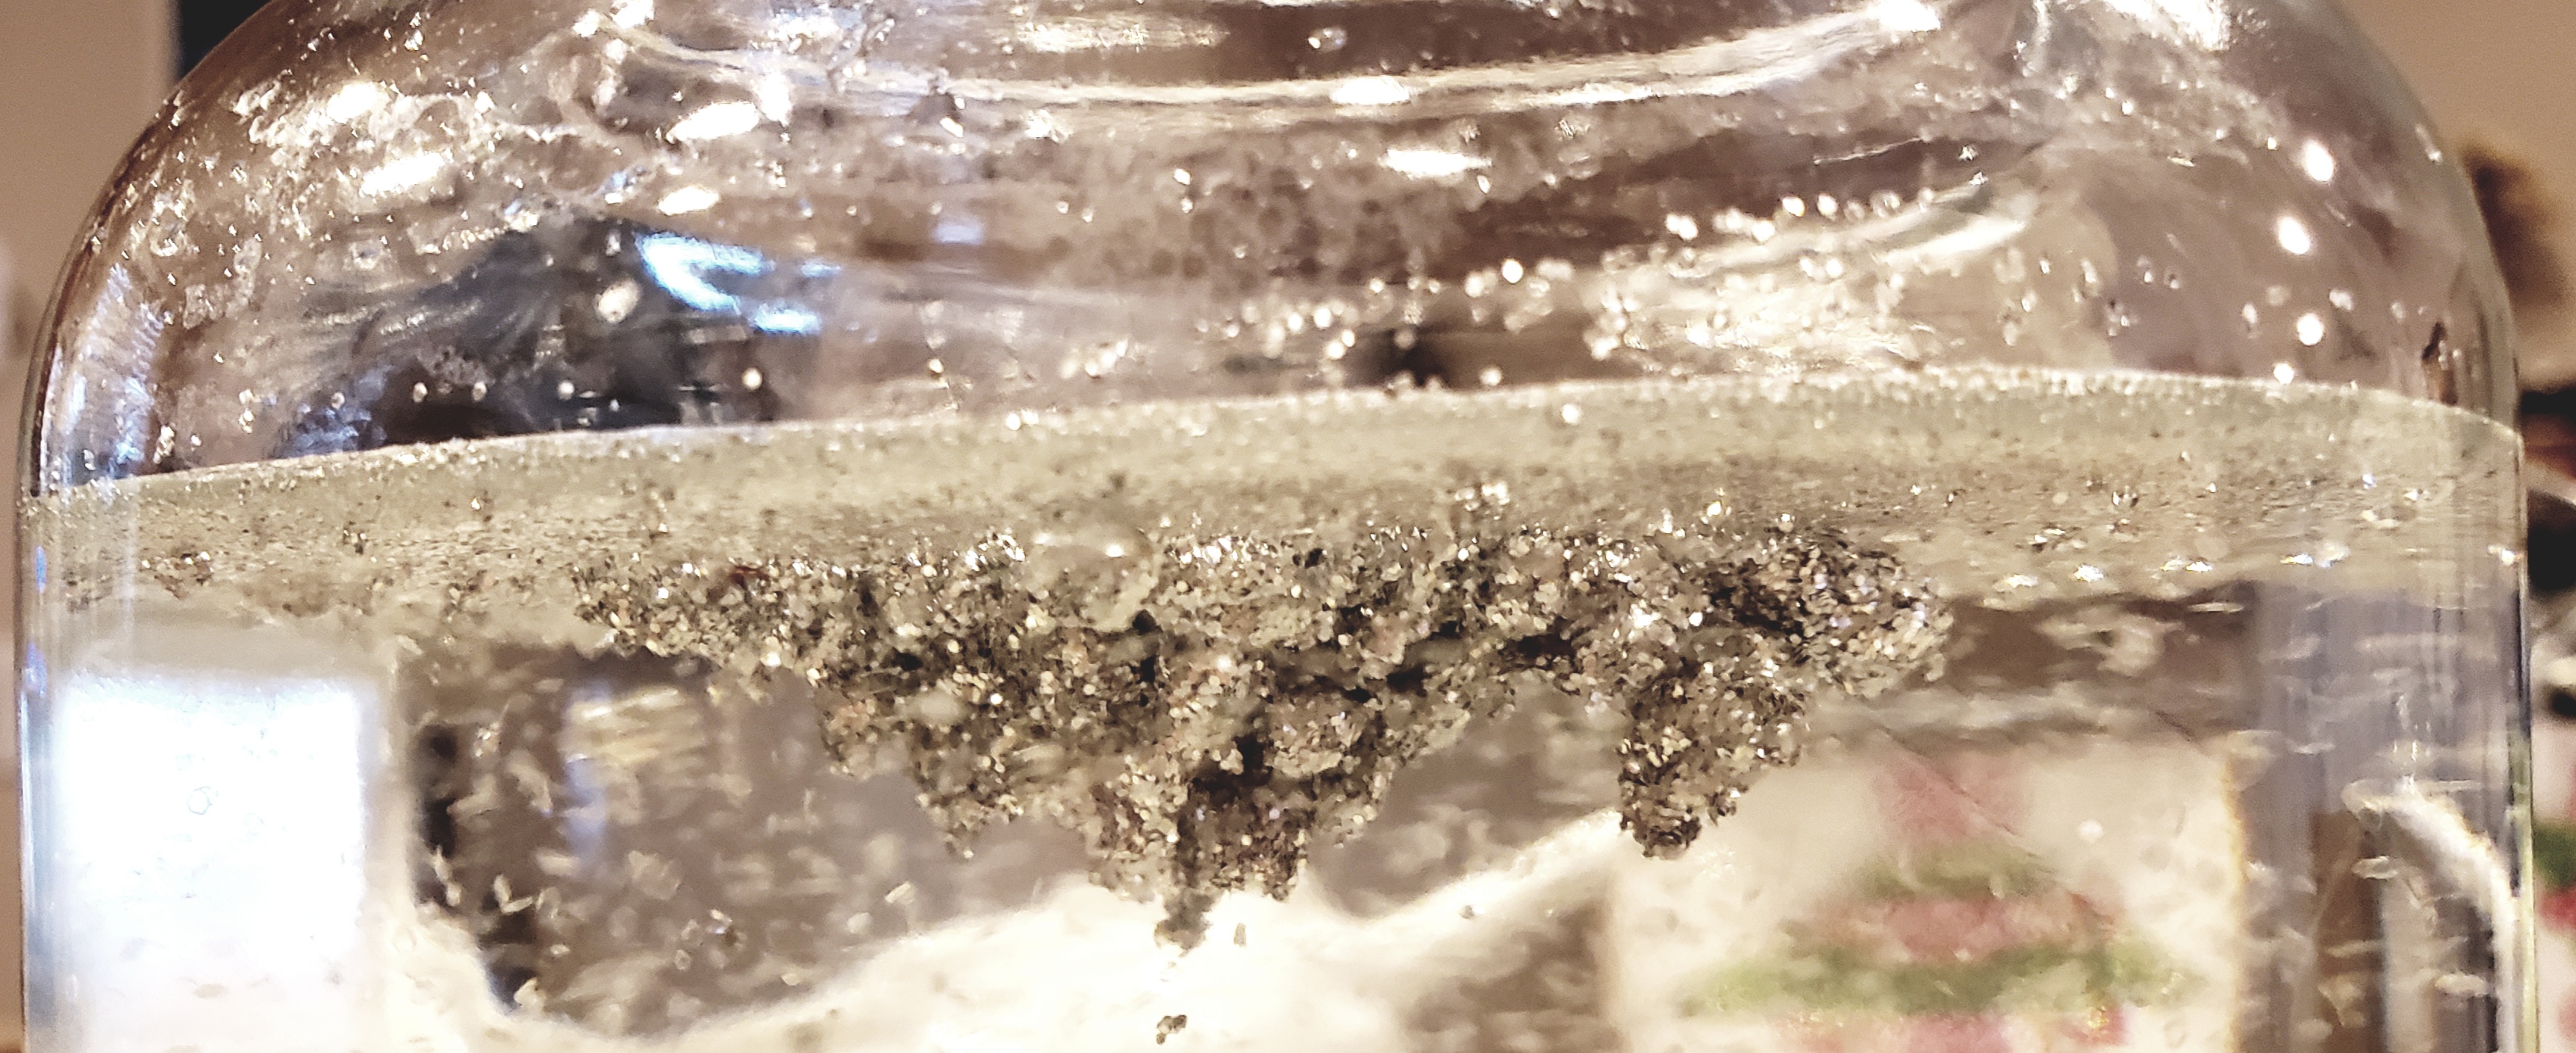
The first thing I tried was some rainbow mylar confetti that I had leftover from previous events. What glorious unicorn doesn't want to be surrounded by rainbow? Lesson 2: test your glitter for color-fastness. The mylar was not color-fast and quickly became a purple soupy mess.

I next tried some fine silver glitter. Lesson 3: Fine glitter combined with the water and glycerin will clump.

I finally landed on some course white and irrisdescent glitter. Next: to get the proportions of water, glycerin, and glitter right. One online source suggested 1 cup water to 1 tbsp glycerin and 1 tbsp glitter. This was substantially to slow-falling and too cloudy. I suggest you start with 1 cup: 1 tsp: 1 tsp. Close and shake your jar to test, then add more glitter if you want, and more glycerin if the snow is falling too fast. 

With a white unicorn and white glitter, we needed a pop of color. I painted on some rainbow stripes on the back side of the jar, and when dry, sealed with Mod Podge.

If you are concerned about the jar leaking, you can also glue the lid onto the jar, using a little of the same waterproof sealant from above on the threads.

The final result? Ulrich in a snowy magical wonderland.

Hopefully my lessons learned above will make your snowglobe journey much smoother! Looking for other ideas?

Safeway had these adorable candy jars available around Halloween. These could be created for any season by painting a seasonal character on and filling with your favorite candy. Or leave some of the jar unpainted and put in a small candle.


Alternatively, my brother received this yummy homemade granola as a gift. Minimal jar decorating needed, outside of a personalized label.

What are your favorite ways to reuse glass jars?


Wednesday, November 2, 2022

Second-Hand Socialite

It's time for the annual second-hand/DIY Halloween costume post. A few years ago, I aspired to be something glamorous and epic for Halloween. And at the last minute, I made a fatal mistake in my DIY-ing, and had to change direction entirely. 

This year, I was out thrifting with my friend T, and kid you not, the Goodwill gods directed me to 2 identical ballgowns, new-with-tags, and in my size and the adjacent size. 

It was meant to be that I should revisit the idea from years ago.  Introducing, painter Gustav Klimt's muse, the socialite Adele Bloch-Bauer. She was the subject of several of his paintings, and the 2015 film "Woman in Gold". 

This is the pre-altered dress. About 6" too long for me, but otherwise a perfect fit and very comfortable. My goal is to not damage the dress with my costume embellishments, so I still end up with an evening gown. 

Beyond this being a generally great gown, the price was fantastic. As mentioned, it was new with tags, so I know the original retail price was $357. The Goodwill price was $50, which was already a great deal. However, I noticed the other size was marked $10 less. ALWAYS ask the question. So I bring both dresses to the register and ask if I can pay the lower price, and they agree! So this gown came home with me for $40 (89% off).

First, I start with hemming the dress for my bitty 5'3" stature. I'm finally trying a zig zag stitch, because it's a stretchy fabric.

If you can learn some of these basic stitches, you can save some major cash. I had a formal dress hemmed last year for a wedding and the alterations cost $70 at Nordstrom. Halloween costumes are a great low-risk project to practice on, because worst case scenario is I only wear it for Halloween. 

Next, I use that 6 inches I cut from the hem, and reuse it to make a wrap that will serve as a faux ruffled "cold-shoulder" neckline. Adele's ruffle is patterned, so I'm painting on a design before sewing. The paint? Craft acrylics from Buy Nothing (free!) mixed with a little textile medium.

Onto the body of the dress, the painting is decorated with what I describe as eyeball shapes. For those, I started with an old bed sheet that  contained a similar pattern, and embellished with acrylic paint.


Now, when I went to attach these appliqués to the dress, I wanted to make sure I could remove them without residue, so I could rewear the dress in the future. I tried 2 products: a basting spray adhesive (did not work to adhere the eyeballs), and a double sided fabric tape, which worked phenomenally. (Cost $9)


Finally, I completed the look with this gold and pearl collar. I had found the collar at an estate sale for $5 years ago, with no purpose in mind, but knowing I'd eventually put it to good use. This collar emulates the stunning bejeweled heirloom necklace that Adele wears.

Here is the completed look! For just $54 (dress, collar, and tape), I was able to create a one-of-a-kind look:

This price is competitive with the average pre-packaged adult costume cost at Spirit Halloween, and is a $320 savings on the leftover strapless formal gown.

Now... time to start thinking of ideas for next year. :)

Saturday, September 17, 2022

Making the Most of Mylar

My parents got me this epically large balloon for my milestone birthday last year. You know it's epically large because this is a normal sized coffee table it's laying on, with normal sized balloon weights seen in the bottom, and that it stayed floating for over 9 months.

What I see now is... that's a whole lotta festive mylar. And with several family birthdays throughout the year, it was inevitable it was going to become wrapping paper.

First step: separate the front and back of the balloon. I simply cut off the neck of the balloon, inserted the point of my scissors into the opening, and cut along the seam. 

Now I'm left with 2 large round sheets. Set your package in the middle and wrap as normal. If you prefer, you can trim to make square sheets, trim to size, or to center your package on the best part of the design.

This balloon was large enough to wrap 2 hard cover books individually, and a medium box. 

Finish your package with a bow. If you are a planner like me, you've collected all the ribbons and bows from previous gift exchanges, and have a small stash in assorted colors for re-use. 


Last, but not least, go to your celebration and have fun!

With gift bags costing $3+, and being the "throwaway" part of the gift, reusing materials is a great way to save and put your funds into the gift itself.


Sunday, March 6, 2022

DIY: Sewing Kit

As we approach spring, I've been doing several cleaning, decluttering, and reorganizing projects around the house, and of course I've come across several items I've kept "just in case" I came up with a project. So time to keep myself honest! 

I came across this easy tutorial for creating a pincushion from a mason jar, and decided to give it a whirl. (Click the link if you want additional directions or examples.)

First, I gathered my supplies (Cost - $0)
  • scraps of fabric (each pincushion will need a 6" square). Do you leftover fabric from making COVID masks, or quilting? If you aren't a sewer, do you have a work shirt or bed sheet that needs to be retired? The only requirement is that the fabric not be super thick, or you'll struggle to close the jar lid again. 
  • a mason/canning jar. This project requires the ring and lid style, so any random jar won't do. I used a jar from a previous jelly making experience.
  • quilt batting. I'll be honest; I kept the stuffing from a toy my dog destroyed. 😆
  • small scrap of felt or cardboard (2-3" circle). Also reused from previous craft projects. This is my 3rd time reusing this same felt. Most recently it served at part of a Halloween costume.

And tools: 

  • scissors
  • glue gun or fabric glue 
  • needle and thread

This is a beginner level project with no sewing skills required!

First, I'm cutting a 6" square out of my fabric. I like these water soluble pencils you can get at the craft store to mark your fabric, but none of our edges will show, so feel free to use any marking device. We're going to end up rounding the edges to make a circle. This project doesn't require an exact pattern, so feel free to free-hand it. If that makes you nervous, print and trace this 6" circle. Note: this pattern works for the smaller mason jars. If you have larger jars, you will likely need a larger circle.

Next: you're going to do a simple stitch around the edge of the fabric. Again, don't worry about being too precise. My stitches we're between 1/8" and 1/4". (The thread color also doesn't matter; the stitches will be hidden.) You'll leave the beginning and end of the circle as loose threads. When you start to pull on these tails, the circle will start to gather into a pouch.

Fill the pouch with your quilt batting. 

Next, insert the inner lid portion into the pouch. (The white you see below inside the pouch is the lid. I show a second lid beside it for reference.) Draw the strings tight, and tie them together in a knot.

Your felt or cardboard circle should be smaller than the lid center. You can trace the lid and then cut a little smaller. Glue it in place to cover the opening of your pouch and cover the stitching.

Push the poufy, quilt-batting-stuffed portion through the ring of the lid, so that the lid lays flush with the ring.

Fill your jars with any small sewing pieces (ex. buttons and bobbins), screw the lids back on, and use your new padded tops as pincushions.


Not only have you used up and upcycled your jar and fabric scraps, but you now also have storage to collect all these stray small notions. 


I was pleased with how easy this came together, and that it will help organize my increasingly messy craft room! These would also make a cute gift for crafty friends.