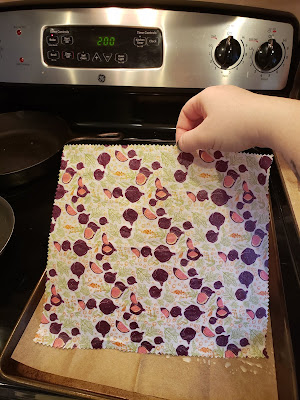
My friend, Tatiana, has been super supportive of my goals to reduce waste, and got me this sweet DIY Beeswax Wrap kit as a holiday gift! Don't know about wax wraps? They are basically wax coated fabric, that can replace cling wrap, and can be reused for months before refreshing.
The kit contains everything I need to make 3 assorted size wraps: fabric in a fun pattern, directions, parchment paper, 3 pieces of wax, a glass jar, and a paintbrush.
First, preheat your oven to 200℉ while you complete the first few steps.
Lay the fabric on a piece of the parchment paper on a cookie sheet. (I ended up using the same piece of parchment for all 3 wraps, and keeping the other sheets for future projects.)
Next, create a double boiler situation by setting the mason jar inside a pan of boiling water. Melt the beeswax in the jar.
Use the melted wax to paint a thin layer over all your fabric. Don't worry if it's perfect or starts to get chunky.
Next, put the cookie sheet with fabric into your pre-heated oven for 1-2 minutes. This helps melt the wax further, so its spreads evenly over the fabric.
Then remove the cookie sheet, and carefully pick the fabric up by the corners, and wave it in the air for about 30 seconds. This will quickly cool the wax until the fabric stiffens.
Finally, test out your new wrap! Simply wrap it around the food you want to package, or bowl you want to cover. The warmth of your hands should soften the wax enough so that the fabric molds into shape. Exhibit A: wrapped orange.
In between uses, you can wash your wrap in cool water with dish soap. You should be able to use the wrap many times before it starts to lose its effectiveness. Then, simply repeat the waxing process.
Not feeling crafty? Get a ready-made wax wrap, like this set of 3 for $18 from Sur La Table.
Have your own fabric but need wax? Get it for about $1.50 per wrap, available online or at craft stores.
Pat yourself on the back for reducing your use of cling wrap and having super cute lunches. :)


No comments:
Post a Comment