Tuesday, April 7, 2020

Survival Skills aka Growing Your Own Food

There's nothing like a global pandemic zombie apocalypse, and the resulting shortage of certain staples at the grocery store, to encourage you to become more self-sufficient and live off of what you have.

It's been a weird year for gardening. We've had a cool early spring, and where normally I'd have tomatoes transplanted already, this is the first week that I'm starting to think about putting plants outside.

So between feeling stuck inside with quarantine, and not feeling like I can plant outside, my mind has gone to "What can I grow from scraps in my kitchen window?" And this year, I'm trying out lettuce and cabbage for the first time.

Lettuce and cabbage are supposed to be super easy - you simply put the leftover core into a shallow bowl of water, and they'll grow roots and more leaves. I gave it a try with a cabbage (from St. Patty's Day corned beef!) and two heads of romaine. There are already very promising signs after about 2 weeks.


Here you can see about 3" of new leaf growth from about 6 new leaves on the romaine. 


Here you can see a few new leaves budding on the top of the cabbage... 


... as well as several healthy roots. 


Now that they have new growth (and it's finally getting a bit warmer outside), it's time to transfer them to soil. Using an enriched soil or compost, bury the roots and leave the leaves exposed. 


I chose to plant in ceramic planters, only because it's been too cold to prep my garden bed. Some guides have said that I should use the amount lettuce of I've grown at this point and call it quits. Others say that I can keep trimming to soil level and get knew regrowth. I'm looking forward to seeing how many rounds I can go. 


End goal? If I only get 1 round of small leaves regrowth, I'll still save 25% on my produce purchasing. Hopefully, I can go multiple rounds, reducing my shopping by 50% or more.

Saturday, April 4, 2020

Shopping while Self Quarantined

These are certainly interesting times. One of the things I miss most while being stuck at home is my regular thrifting outings. I want to keep my life as "normal" as is possible given the situation while also being a bit conservative (because who knows what will happen to the economy).

Not only can we continue to support the businesses we love, but we can also keep our regular browsing and shopping cadence while stuck at home, and still keep our eco values while brick and mortar thrift stores are closed.

If you have been laid off or had a reduction in hours, you can use your unexpected free time to do some spring cleaning and get some income. Online sales are a great way to keep things going while keeping your distance from others. You still have a customer base with some of us stir-crazy folks. Direct sales (through sites like Poshmark) will get you the most, while consignment or second hand  sales (through sites like thredUP) will give you less but take some of the work off of you.

Last week, I occupied some time with "browsing the racks" at thredUP, and ended up with quite the good shopping cart. I ordered 5 items, and here's what's been delivered so far:

First, this great short elephant kimono. What? I don't like elephants (says the girl with an elephant pendant). Having loved some of the kimonos I rented from LeTote, I knew I wanted to add this style to my wardrobe. Cool and lightweight, it's an easy way to dress up some of my basic tees.


Then, this floral blouse, which was new with tags! This can be worn from day to night, from the office to date night. With these voluminous sleeves, I'll plan to wear this with heels to balance my proportions.


Fortunately, I also got some great heeled boots! Three-toned black, navy, and grey, these booties will go with most things, and I can see wearing them with pants or dresses. I love the chunky heel for comfort and stability, and they coordinate with the other items in my basket.


Things I like about shopping on thredUP: they measure the clothes or tell you if they are showing "default sizing". Note: sometimes they measure flat instead of around, so you need to make assumptions or move on if the size looks too small.  They also provide condition. I often select items that say "You might confuse this with new!"

They've been running a lot of promotions recently. Everything I bought this week was an extra 35% off.


Total, I paid $44.97 for these 3 items, compared to $140.99 new, a $96.02 (68%) savings!

Outside of thredUP, I was also glad to have Goodwill remind me about their online presence. Most of their listings are auction style, so you can spend quite a bit of time checking out what is about to expire as well a never ending rotation of new items.

Best wishes to you all, and hope e-commerce helps you sell or shop safely from your home.

Monday, March 30, 2020

Saving a Scratching Post (Easy DIY Repair)

T and I have quite an active kitty, Toby, who just turned 10 this year. He's having a mid-life crisis renewed burst of kitten playfulness, and is going nuts on anything he can scratch. Fortunately, we have scratching posts in several rooms for him to take his energy out on. Unfortunately, they are starting to get destroyed (and look messy) after a few years of abuse. The good news is it's super easy to clean up with just a pair of scissors and some glue. I chose a hot glue gun. You could also use fabric glue or wood glue.

Exhibit A (Before). There is frayed rope on much of the scratching post and a few ropes that are completely ripped loose. 

First, clean up all the loose shreds of twine. I trimmed some of the shreds on the post too, but didn't go nuts because I didn't want to leave it bald!


Next, add a row of glue onto the bald part of the post and press down one of the loose ropes into place. Because these were completely frayed at the ends, I twist or braid them, and continue to glue down until the end is secured. Repeat for each loosened rope.


Exhibit A (After). Not brand new, but way less straggly than when we started. No loose ends or loose shreds of twine.


Exhibit B (Before). This post has the twine barely holding on to the batting ball and the base.


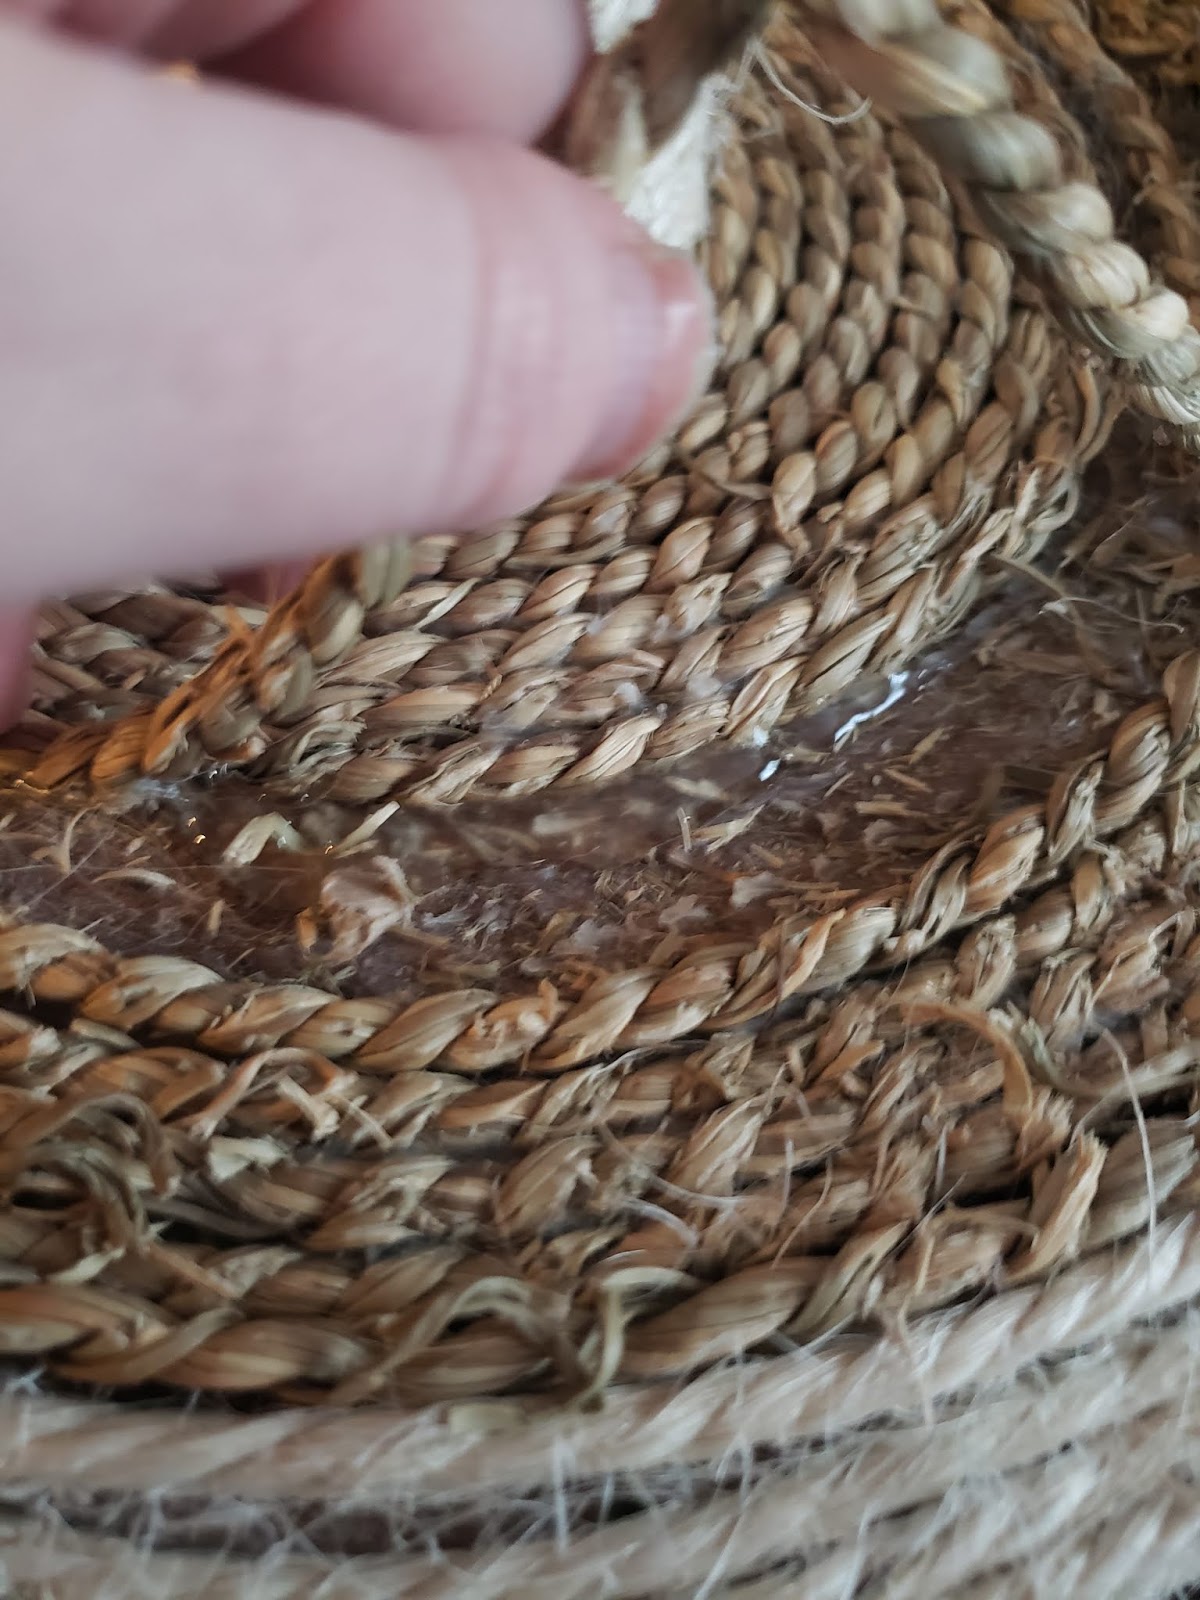
First, I squirt a line of glue onto the base, to secure the rope. I go a few inches at a time, one row at a time, re-winding the rope in the spiral that it was originally. I don't want to go too fast, or my glue will dry before I can get the full spiral laid down.


I repeat with the batting ball, gluing and laying down one row at a time, spiraling around the ball form.


Trim a few loose strands of twine, and viola! Just like new. Exhibit B (After).


Just about 10 minutes of time saved me from replacing worn, ratty toys (at about $20 each), and will give Toby many more hours of scratching time.


Wednesday, March 18, 2020

Earth-Friendly Ears

Whether you call them cotton swabs, cotton buds, or Q-Tips, you likely have a few uses for these sticks around your bathroom. For me, it's drying my ears or removing the last traces of eye makeup after a shower.


After seeing this devastating image of seahorse dragging around a Q-tip floating around the web, I wanted to prioritize swapping these out.


They may also be the next item to gain attention from governments, after grocery bags and plastic straws. Scotland has already banned plastic cotton buds, while the EU is looking at single use plastics in general.

Plastic, you say? Check your medicine cabinet and see if yours have a cardboard or plastic stem. If they aren't paper-based, that's the first easiest upgrade.

The next-level upgrade is to look at reusable options: for ear-cleaning they make them in durable plastic, metal, and wood. All are washable. I tested a couple out and wanted to share my results.

I first tried these Utility Tip ear cleaners, professing to be "ultra soft", because I was not sold on putting plastic into my ear instead of soft cotton. I was right to be nervous. After a few tries, I couldn't handle these, which felt like they were scraping me. However, I had a couple friends swearing by similar products, so I decided to give another brand a try.


Next up was ClĂ­nere. These are a bit better. Not only was the fin side substantially softer than the Utility Tip ones, but it also has a scoop side for if you have a wax issue. They still don't give me the same super dry satisfaction of cotton, but reduce post-shower water by about 80%.


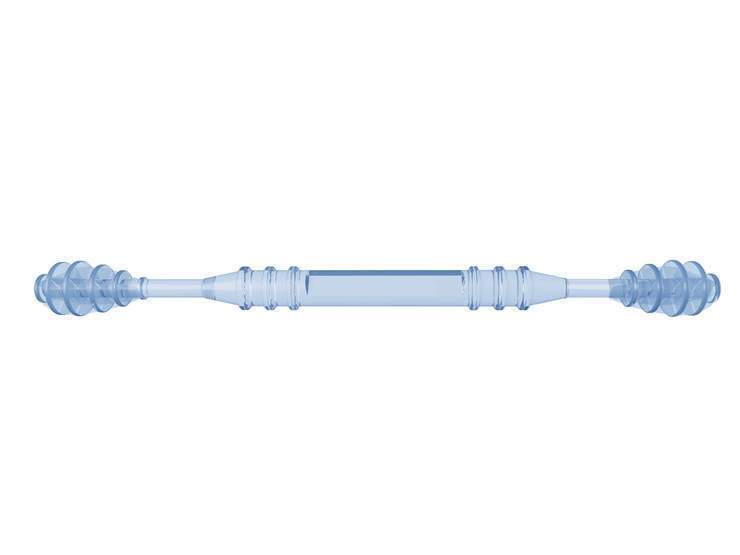
Finally, I tried Last Swab. I first learned about them through their Kickstarter, and decided they would be my last ditch effort to finding a really comfortable reusable swab. Instead of plastic, they are made from silicone, and have a couple different designs: a regular round tip with bumps for giving your ears a good scrub, and a smooth pointed tip for makeup use. These were by far the most comfortable for ear use. It would be a fantastic tool for earwax removal and a decent tool for water removal. For makeup use... because it's smooth and not absorbent, it does nothing for makeup removal. I imagine it would be a great choice for blending makeup.


Having decided that none of these gave me the super dry feeling of cotton, I tried one last thing: an old t-shirt. I've been using cut up t-shirts for a few other applications: as hankies, as makeup remover pads, so I have plenty around. Simply wrap it around a finger and go for it. Viola! Not only did my ears get nice and dry, but it's probably the only doctor-approved method listed here. The used t-shirt squares are collected in a mesh lingerie bag, and then washed with my regular laundry.

In summary, after lots of experimenting, I will likely use t-shirts for ear drying and makeup removal, and Last Swab for wax removal.

T-shirts: FREE
Last Swab: $12, pay back after 4 boxes or 2000 Q-Tips

Q-Tips with cardboard stem: $3.29 for 500 at Target
Generic swabs with cardboard stem: $1.99 for 500 at Target
Generic swabs with plastic stem: $1.99 for 300 at Walgreens

(You can break even or even save $$ with the switch to cardboard!)


Saturday, March 14, 2020

Flax FAIL

Friends, it's been a crazy month with everything going on in the world, but I'm back. I try to only post good recommendations here, that are tried and true, but my friend Tatiana pointed out, you can learn just as much from my fails. Not all products or projects will be successful, and you can either bypass my mistakes, or avoid it altogether. So, here's one *not* to try. :)

For those with curly hair, you are probably well aware of the challenges: one side may dry curlier than the other, we're prone to frizziness, there are 8000 rules about how to not damage the curl (you should wash in cold water, sleep on a silk pillow case, never use a regular towel, only microfiber)...

On a good day this is how my curls dry naturally with no product. I have a bit of frizz, and would like more definition. On a less good day, well... there's a reason I revert to straightening my hair vs leaving it to chance.


Now that I'm working from home for the foreseeable future (thank you zombie apocalypse), I have a lot of flexibility for experimenting with my hair. I've been intrigued to try this DIY hair gel recipe, that's touted as both a miracle for curly and kinky hair as well as low waste. It's made with just water and nutrient-rich flax seeds, full of fiber, proteins, and Omega-3.

There are dozens of how-to videos and blogs online showing soft defined curls, a nice thick hair gel, and an incredibly simple process, so I'm excited to get started. I mean just look at this one:


I jump right into step 1: boil 1/4 cup flax seeds with 2 cups of water, on medium for about 10 minutes.


Each of the various videos have different cooking times resulting in different thickness of gel, so cook down to your preference.

Next, cool the mixture. Then strain though a knee-high stocking, or a mesh strainer. The seeds will be strained out, leaving a translucent gel.


Wait, what? I'm left with an oatmeal-y sludge! No viscosity after cooling, just grainy, soupy sludge!

I think I figured out the problem, yet none of the recipes clearly call it out: you need to use WHOLE flax seeds, and I used ground.

30 minutes lost but not wasted. I've learned one way to *not* make hair gel! If you end up trying a home hair gel recipe, let me know what works for you.

Monday, February 3, 2020

Rideshare for Savings

Headed to the airport the other day, I realized I haven't shared one of the EASIEST ways to save a few bucks while making the eco-conscious choice.

If you take taxis, as many of us do, switch to a rideshare app! I won't endorse any one app, but I do want to talk about a great feature: shared or pooled rides.

Prior to rideshare apps, when traveling, I would be standing in the taxi line thinking, "we're all headed from the airport to the the same handful of hotels. Wouldn't it be great if we could double up, save some traffic, and split the fare?" But very rarely could you coordinate a shared ride successfully. Now, apps make it easy.

Here's an example from Lyft. A ride for just myself or my party would be $39.49, but if I'm willing to share a car with others going the same direction, it drops to $31.67 (a 20% savings). If I'm willing to walk a couple blocks to meet at a more convenient pickup point for all, my trip reduces even further to $28.25 (a 28% savings). They also show you the time added to accommodate the extra pickups/dropoffs, and this example is fairly average from my experience: an added 6-8 minutes.


This next example is from Uber. Their standard option for just you/your party is UberX, costing $30.70 for this ride. If you are willing to share the ride, choose Pool for $19.07 (a whopping 38% savings and 12 minute added time).


Keep in mind the available options, savings, and added time are all variable depending on when and to where you are traveling. For the best outcome, I have a couple apps downloaded and compare at the time I'm requesting my ride.

Cons: you need to have a little flexibility for arrival time.

Pros: in addition to saving money, there are all of the eco benefits of carpooling... and the apps take care of all the coordination for you!

Monday, January 20, 2020

New Year, New Clothes

A couple weeks ago, my friend Mariko messaged me to plan a thrifting date, and I jumped at the opportunity. I never need an excuse to go shopping, but I knew going with someone else would lead to some different shops, and I was excited to see if fresh eyes would lead to some fun finds.

Where I tend to focus more on budget basics, Mariko has a passion for vintage. In fact, she is a collector of vintage Pyrex, classic cookbooks, older editions of Agatha Christie novels, and collectibles. Those she is willing to part with, she'll bring to markets like the SoDo Flea Market, or post on her Etsy shop.

So, adding a couple vintage shops to my usual haunts, Mariko and I headed out, and powered through 5 stores in 2 hours! Capitol Hill has *many* shops, and you could easily make a full day out of it. We hit: Lifelong Thrift (donated/thrift), Crossroads Trading (consignment), Revival Shop (vintage and boutique), Goodwill (donated/thrift), and Pretty Parlor (vintage and boutique).

Right away, I found success: these Calvin Klein skinny boyfriend jeans fit like a glove and were in great condition at Crossroads Training.


They were on half-off special, so I took them home for $12. Compare at $70 new.


Next stop, I found this great skirt at Lifelong Thrift. With a gauzy outer layer, it was perfect for a night out on the town. (I wore it to the theatre this Saturday, and my friend Jeni exclaimed, "It's like an adult tutu!")


A lucky find, this skirt was new with tags, costing $136 retail, and I scored it for just $7.


I'm sad to say I missed capturing the best moment of the day: Mariko didn't go empty-handed. She took home a comfy and colorful vintage muumuu in varying shades of blues and purples from Revival Shop.

At the end of the day, I spend $19 and saved $187 (90%), all while having eco-friendly fun with a friend.